Monday, February 27, 2012

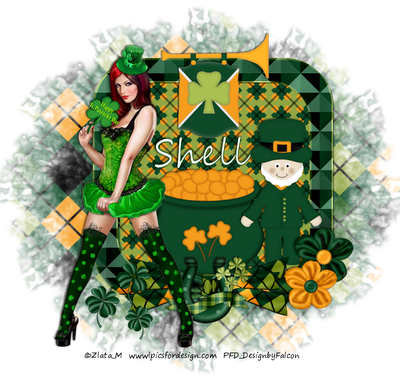
Happy St Pats Day ♣


My Tutorials are strictly my own creations,
if they resemble another it is purely coincidence.
This was written with the use of PSP X2.
You may create it any version of PSP.

Supplies Needed.

Scrap FTU Happy St Pats Day by Shell of Shells Scraps .You can find it Here.
Please remember to leave some love.

I'm using the artwork of © Eugene Rzhevskii. Currently available at PFD Here

Font of choice

Mask_4 by Weescotslass Here

Open new image 650 x 700 transparent background.
Open frame 1 copy paste as new layer resize 75%.

Effects-CPK Design click on glass with these settings.
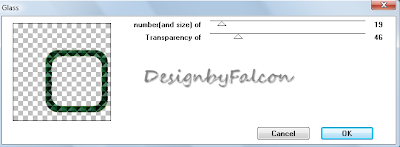

Select Magic wand click inside Selections Modify Expand by 5.
Open paper7copy paste as new layer resize 65% arrange to your liking.
Selections Invert tap delete. Move below frame layer.
Open Potofgold 2 copy paste as new layer below frame layer. Resize 45% add drop shadow.
Open leprechaun1 copy paste as new layer resize 35% arrange on right of frame.
Add drop shadow.
Open partyflag copy paste as new layer resize 34% arrange at top of frame, add drop shadow.
Open flower 3 copy paste as new layer resize 18% arrange on right of frame, add drop shadow.
Open bow 1 copy paste as new layer arrange at bottom of frame.
Resize to fit then use your Eraser to remove any thing overhanging the frame.
Open flower4 copy paste as new layer arrange on right of frame then resize 16%
add drop shadow.
Open horseshoe2 copy paste as new layer resize 29% arrange at bottom of pot of gold.
Image Mirror, add drop shadow.
Open your tube of choice copy paste as new layer resize if needed arrange on
left of frame.give it a drop shadow.
Open clover1 copy paste as new layer arrange on layer.Resize 15% add drop shadow.
Now duplicate the clover twice.
Select your background layer select all.
Open paper6 copy paste into selection then apply your mask, merge merge group.
Please add anyother element you wish too.

Add your Artist © and your name then crop.

Thank you for trying my tutorial, I hope you enjoyed it.
I'd love to se your results so that I can show them on my Blog.

Tutorial by © Maree *Falcon (aka DesignbyFalcon) 26th February 2012.


Photobucket

For Good Luck♣


My Tutorials are strictly my own creations,
if they resemble another it is purely coincidence.
This was written with the use of PSP X3.
You may create it any version of PSP.

Supplies Needed.

Scrap Colorful Lucky Irish by Design by Joan.You can purchase it at Here.

I'm using the artwork of ©Alehandra Vanhek. Currently available at PFD Here.

Font of choice

Mask_ by Weescotslass Here.

Open new image 700 x 700 transparent background.
On bckground layer Select All open Paper2 copy paste into selection-deselect.
Apply your mask Merge merge group.
Open Elem19 copy paste as new layer resize 85% move about 2/3rd up towards top of layer.
Open Gold Frame copy paste as new layer arrange in center of layer.
Open Elem 57 copy paste as new layer resize 75% arrange on left of gold frame.
Add light drop shadow.
Open your main tube copy paste as new layer resize if needed arrange on layer.
Add drop shadow.
Open Elem17 copy paste as new layer arrrange on left of frame. Add drop shadow.
Open Elem 48 copy paste as new layer arrange at bottom of gold frame. Add drop shadow.
Open Elem 46 copy paste as new layer arrange on left of pot of gold.Resize 85%
add drop shadow.
Open Elem 47 copy paste as new layer arrange on right add drop shadow.
open Kiss copy paste as new layer resize 90% arrange on hat.

Add your Artist © and your name then crop.

Thank you for trying my tutorial, I hope you enjoyed it.
I'd love to se your results so that I can show them on my Blog.

Tutorial by © Maree *Falcon (aka DesignbyFalcon)27th February 2012.


Photobucket

Forum set-Love Story


My Tutorials are strictly my own creations,
if they resemble another it is purely coincidence.
This was written with the use of PSP X3.
You may create it any version of PSP.

Supplies Needed.

Scrap Love Story by Severine-Le paradis du Scraps.You can purchase it at Here.

I'm using the artwork of ©Keith Garvey Currently av
ailable at PTE Here.

Font of choice .

Animation Shop

Open new image600 x250 transparent background.

Select all open IpdsPaper11 copy paste into selection deselect.
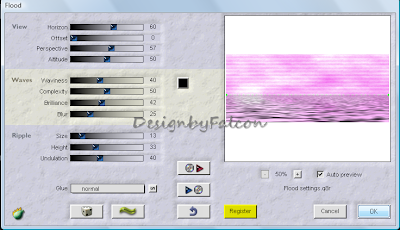
Using Flaming Pear-Flood with these settings.


Click ok.
Open IpdsE7 copy paste as new layer resize 35%. Image-Mirror move to edge of layer.
Add drop shadow.
Open IpdsE35 copy paste as new layer resize 30% move to center of layer add drop shadow.
Open IpdsE39 copy paste as new layer resize 32% move to the right of layer add drop shadow.
Add your tube now i used a closeup tube then resized give this a drop shadow now.
Add any other element you wish too now.
Set your background to # cc7967 and closeout your foreground
Draw a square around the outside of your tag.


Duplicate frame twice.Using your Magic wand click on rectangle box.
Then apply these settings-
Adjust-Add noise Uniform 50 tick box click Ok.
Repeat for frame2 -55 layer 3 increase to 60.Then deselect.

Add your Artist © and your name.


Leave open as we will continue for animation.
now to continue for small forum tag.
Avatar
Select part of your tag copy paste as new Image, resize to 150 x 150 or larger if you prefer.
Select Preset shapes-Rectangle I chose # background foreground closeout.
Draw a square around your tube convert to raster. Duplicate frame layer twice.
Using your Magic wand click on rectangle box.
Then apply these settings-Add noise Uniform 50 tick box click Ok.
Repeat for frame2 -55 then layer 3 increase to 60.Then deselect.

Add your Artist © and your name.

Animation

Open your Animation Shop then click back into Psp.Select your large forum tag.
Closeout frame layers 2 and 3. Click on background layer.
Edit Copy special Copy Merged.
Click into AS right click paste as new animation.
Back in Psp closeout frame1 layer, open frame 2 click backinto AS.
Edit Paste After Current frame.
Repeat as above for frame 3 layer.

We apply the same when animating the small forum tag.
On your small tag I am going to slow down the animation.
Select all, then use both the Alt+Enter keys and
change the Frame Properties to 20.
Save both as Gifs


Thank you for trying my tutorial, I hope you enjoyed it.
I'd love to se your results so that I can show them on my Blog.

Tutorial by © Maree *Falcon (aka DesignbyFalcon) 27th February2012.


Photobucket

Sunday, February 12, 2012

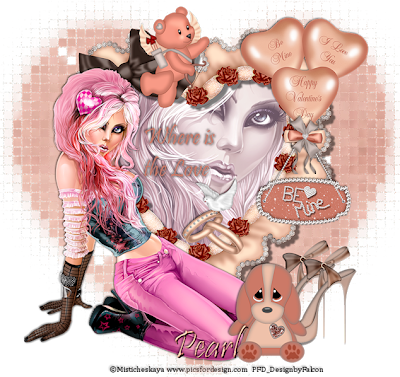
Where is The Love♥


My Tutorials are strictly my own creations,
if they resemble another it is purely coincidence.
This was written with the use of PSP X2.
You may create it any version of PSP.
Supplies Needed.

Scrap Rose Romance by Delicate Pearl .You can purchase it at Lollipops n gumdrops Here.

I'm using the artwork of © Mistickeskaya Currently available at PFD Here

Font of choice

Mask_51 by Weescotslass Here

Open new image 700 x 700 transparent background.

Open DPI-RoseRomance-element01 copy paste as new layer resize 85% add a drop shadow.
With Magic wand click inside heart, Selection Modify Expand by 4.Add new raster layer.
Open your closeup tube copy paste into selection on the new layer.move below frame layer.Right click Merge Down.
Open DPI-RoseRomance-element04 copy paste as new layer resize 35% arrange at top of frame, give a drop shadow of -2/-2/50/5.
Open DPI-RoseRomance-element06 cop paste as new layer resize 65%
arrange at top of frame add drop shadow.
Open DPI-RoseRomance-element40 copy paste as new layer resize 46%
arrange below balloons, see tag give a light drop shadow.
Open DPI-RoseRomance-element15 copy paste as new layer resize 39%
arrange at bottom of frame add drop shadow.
Open DPI-RoseRomance-element23 copy paste as new layer resize 36%
arrange at bottom of frame right side, add drop shadow then duplicate
move one shoe see tag for placement. Add a drop shadow.
Open DPI-RoseRomance-element30 cop paste as new layer resize 39%
arrange in front of shoes add drop shadow.
open your main tube copy paste as new layer adjust size if needed
arrange on left then add drop shadow.
On background layer select all. Open DPI-RoseRomance-Paper09
copy paste into selection-deselect.
Apply mask merge group.Effect Textured Effects-Mosaic Antique
Grid 50/50 Mosaic70/2/50.


Add your Artist © and your name then crop.

Thank you for trying my tutorial, I hope you enjoyed it.
I'd love to se your results so that I can show them on my Blog.

Tutorial by © Maree *Falcon (aka DesignbyFalcon) 12th February 2012.


Photobucket

Friday, February 10, 2012

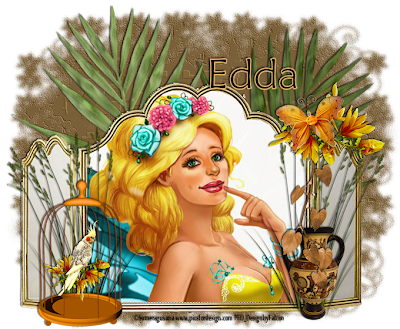
Fairy Dreamz♥


My Tutorials are strictly my own creations,
if they resemble another it is purely coincidence.
This was written with the use of PSP X2.
You may create it any version of PSP.
Supplies Needed.

Scrap CU Dream World by Edda-Claudin Design .You can purchase it at Scrappindollars Here.

I'm using the artwork of ©Sumeragisama Currently available at PFD Here.

Font of choice

Mask_284 by Weescotslass. Here

Open new image 750 x 600 transparent background.

Open CD_Dream05 copy paste as new layer.
Using your Freehand tool-Point to Point go around the outline of center frame.
Selections Modify Expand by 4. Open your closeup tube copy paste into selection.
Give frame a drop shadow.
Open 102 Graeser_biggi.K-1 copy and paste above background layer.
Arrange behind frame add drop shadow.
Open CD_Dream013 copy paste as new layer resize 65% arrange on left of layer.
Add a drop shadow then duplicate Image Mirror.
Open CD_Dream011 copy paste as new layer resize 43% arrange on left of frame
give it a drop shadow.
Open CD_Dream08 copy paste as new layer resize 42% arrange on right of frame,
give it a light drop shadow.
Open CD_Dream012 copy paste as new layer resize 65% arrange on right add drop shadow.
Open CD_Dream09 copy paste as new layer resize 36% arrange at top of frame.
Add a drop shadow.
Click on background layer. Floodfill with #e4b36a.
Effects-textured effects-Sandstone with these settings.

Then apply your mask merge merge group.
Add your Artist © and your name then crop.

Thank you for trying my tutorial, I hope you enjoyed it.
I'd love to se your results so that I can show them on my Blog.

Tutorial by © Maree *Falcon (aka DesignbyFalcon) 10th February 2012.


Photobucket

ForeverMine ♥


My Tutorials are strictly my own creations,
if they resemble another it is purely coincidence.
This was written with the use of PSP X2.
You may create it any version of PSP.
Supplies Needed.

Scrap Forever Mine by Jen-SleeknSassy Designz .You can purchase it at Scrappindollars Here.

I'm using the artwork of ©Eugene Rzhevskii Currently available at PFD

Font of choice

Mask_287 by Weescotslass Here.

Animation Shop

Open new image 700 x 700 transparent background.

Select All copy paste into selection FM_Paper8 deselect apply mask merge merge group.
Effects-Textured Effects Mosaic Antigue Grid settings 50 50
Mosaic settings 70-2-50 box ticked.
Open FM_Element23 copy paste as new layer arrange at top of mask add drop shadow.
Open FM_Element2 copy paste as new layer resize 45% arrange on layer add drop shadow.
Open FM_Element4 copy paste as new layer Image Mirror arrange on left of layer resize 65% add drop shadow.
Open FM_Element7 copy paste as new layer arrange on center right. Resize 45%.
Open FM_Element31 copy paste as new layer arrange bottom of mask resize 65%
add drop shadow.
Open FM_Element29 copy paste as new layer arrange at bottom resize 45% add drop shadow.
Open FM_Element57 copy paste as new layer arrange on layer next to heart at top.
Add drop shadow.Image Mirror.
Click on mask layer Duplicate twice.Click onto original layer then apply these settings using
Xfeno Constellation on mask.


Click on dupicated layer 1 apply settings this time hit Random Seed button once.
Repeat for duplicated layer2.
Open your tube copy paste as new layer resize if needed arrange on left of layer see tag.
Adddrop shadow.

Add your Artist © and your name.


Animation.

Open Animation shop then click back to psp.

Close out mask layers two an three. Make sure you are on bottom layer.
Edit Copy special-Copy merged.Click into AS paste as new animation.
Click back into Psp closeout layer 1 open layer mask 2 copy special-copy merged.
click back into AS Edit Paste- paste after current frame.
Repeat for mask layer 3.
Check your animation and if happy save as Gif.

Thank you for trying my tutorial, I hope you enjoyed it.
I'd love to se your results so that I can show them on my Blog.

Tutorial by © Maree *Falcon (aka DesignbyFalcon) 10th February 2012.


Photobucket

Monday, February 6, 2012

Secrets of Xmas ♥

Click Here 4 Tut ♥


Photobucket

For The Girls


Supplies Needed

Tube by Ismael Rac and can be purchased Here
Font 4magic DNA
Drop Shadow of choice.
Mask_84 by Weescotlass Here
MyuRa's Meister
Xenofex 2
Remember to Save Often!!!

Let's begin

Open new image 600 x 600.
New layer flood fill with #ff00ff apply mask, merge group then
duplicate layer twice rename layer 1,2, &3.
Open Xenofex - Constellation with these settings:
Repeat for the other 2 layers each time hit the Random Seed buttom.
New layer flood fill with #c0c0c0 apply mask merge group.
Copy paste your tube, resize if needed.

Add your Artist © and your name.
This is only a guide and feel free to use any other elemenst you wish.
Most of all have fun creating.

Animation.

1. In psp close out layers 2 and 3 click on layer 1.
2. Edit copy special copy merged click in AS then paste as new Animation.
3. Click back to psp close layer 1 open layer 2 then paste After Current Frame.
4. Back in psp close out layer 2 open layer 3 repeat 2.
5. Select all then Animation -resie Animation by 80 percent.

Save as a Gif.
This tutorial was written by Maree (aka Falcon) on 23 July 2010
Any similarities to this tutorial are purely coincidental

© Maree


Photobucket

Devlish Attitude ♥


Supplies Needed

Tube of choice, I am using the fantastc artwork of Elias Chatzoudis
you can find the artwork here at MPT
Font: VinerHand &
Xfeno 2 -Constellation.
Eye Candy-Impact - Gradient Glow
Drop Shadow of choice.
Mask_81 by Weescotslass

Remember to Save Often!!!

Let's begin

Open new image 600 x 600.
Set your Material palette with your chosen colors. I used #ff0000 and #000000,change to
Gradient and use these settings:

Using your rectangle tool draw out a square not to large. convert to Raster than
duplicate.Image - Mirror.Move one square to form this:

Click inside 1st square and change your material palette to these settings:


New layer, then flood fill frame-deselect (ctrl+D).
Repeat for 2nd frame but change the setting to these:
Using your Selection Tool draw a square around the center box:
New layer then copy paste a part of your tube-deselect.Move below frame layer
Now using your Freehand Tool draw out around the square, see below.
New layer,add part of your tube, repeat for the other frames.
Close out background layer and merge visible.
Add your main tube/s position them.
Click on Preset shapes and draw out a shape you like to use.I used the arrow.
Add the wordart I used Vinerhand White with Stroke 1 - Red color.
I then add a Gradient Glow with these settings:

Add a new layer above background and flood fill with #000000.
Apply your mask, Merge group.
Effects-Xfeno-Constellation with these settings:
Add Drop Shadow to your layers except mask layer.

Add your Artist © and your name then crop and save.
This is only a guide and feel free to use any other element you wish.
Most of all have fun creating.
If you wish to Animate please continue.

Animation:
Open AS then click back to psp
With Magic Wand click on frame layer then holding down Shift key click on Arrow layer.
Adjust-Add Noise -Uniform - Noise - 30.Remeber to click on both layers then deselect (ctrl+D).
Edit-Copy Special-Copy Merged. Click into AS then paste as a New Animation.
Back in psp Click Undo button twice then repeat above, noise this time 35 then 40.
Check your animation if happy save as a Gif and your done.
I hope you have had fun.
This tutorial was written by Maree (aka Falcon) on 16 October 2010
Any similarities to this tutorial are purely coincidental


Photobucket

Sunday, February 5, 2012

Be Mine ♥


My Tutorials are strictly my own creations,
if they resemble another it is purely coincidence.
This was written with the use of PSP X2.
You may create it any version of PSP.

Supplies Needed.

Scrap With Love FTU Blog Train by Niurka KC Design .You can find it Here.
Please leave some love.♥

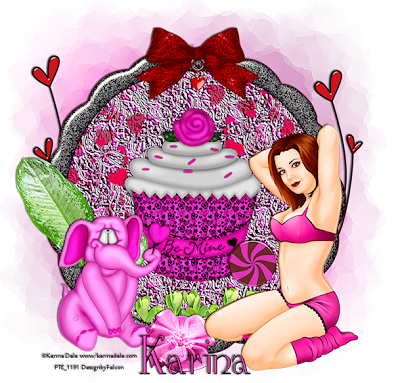
I'm using the artwork of ©Karina Dale and is Currently available at PTE Here

Font of choice

Mask_27 by Horseplay's Pasture Here.

Open new image 700 x 700 transparent background.

Open Element 33 copy paste as new layer Click inside with Magic wand Selections Modify Expand by 4.
Open paper2 copy paste as new layer Selections Invert tap delete, deselect.
On paper layer Effects Textured Effects polished Stone using these settings:


Open Element24 copy paste as new layerabove paper layer, then resize 45%
duplicate arrange on layer.
Open Element3 copy paste as new layer arrange at bottom of frame use your
selection tool to remove any over hang.Add drop shadow.

Open Element23 copy paste as new layer resize 75% arrange on left of frame.
Open Element26 copy paste as new layer resize 63% arrange at bottom of frame,
add drop shadow.
Open Element47 copy paste as new layer resize 32% arrange on layer
add drop shadow.
Open Element17 copy paste as new layer resize 75% arrange on left of frame.
Add drop shadow.
Open your tube copy paste as new layer arrange on right of frame
add drop shadow.
Open Element21 copy paste as new layer resize 29% arrange at top of frame
add drop shadow.
Open Element28 copy paste as new layer below frame layer, resize 65%
add drop shadow.
Open Element19 copy paste as new layer above background layer.Resize 45%
add drop shadow then duplicate, Image Mirror.
On background layer Select All copy paste paper 12 into selection-deselect.
Apply mask merge merge group.


Add your Artist © and your name then crop.

Thank you for trying my tutorial, I hope you enjoyed it.
I'd love to se your results so that I can show them on my Blog.

Tutorial by © Maree *Falcon (aka DesignbyFalcon) 5th February 2012.


Photobucket

Valentine Girl ♥


My Tutorials are strictly my own creations,
if they resemble another it is purely coincidence.
This was written with the use of PSP X2.
You may create it any version of PSP.

Supplies Needed.

Scrap Adore You by Jenni-Chaos Lounge.You can find it Here.

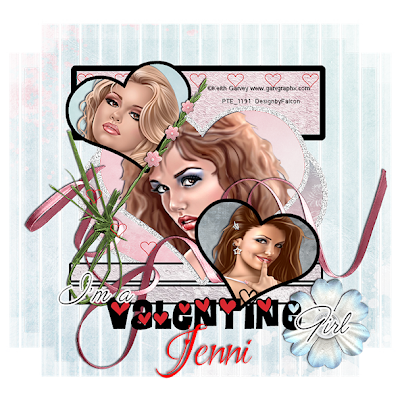
I'm using the artwork of ©Keith Garvey Currently available at PTE Here.

Font of choice

Template by Lithium Flower Here

Mask_299 by Weescotslass Here

Open new Template delete the © layer.

Click on Oval layer Selections Select All Float Defloat.
Open AdoreYou Paper2 ChaosLounge copy paste into selection.Deselect
Click on Big Heart layer Select All Float Defloat.
Open AdoreYou Paper5 ChaosLounge copy paste into selection open your closeup tube copy paste as new layer arrange over heart Selections Invert tap delete.
Give your tube a drop shadow.
Repeat this for the Top and Bottom heart layers.
I used AdoreYouPaper6 for the top heart and
AdoreYouPaper 1 for Bottom heart.
Click on Rectangle layer Select All Float Defloat open AdoreYouPaper2
Image Flip copy paste as new layer arrange over rectangle
Selections Invert tap Delete.
Repeat for bottom line 1 an 2 remembering you need to paste paper again.
Open AdoreYouRibbon1 ChaosLounge copy paste above top left frame layer resize 65%
add drop shadow.
Open AdoreYouGrass ChaosLounge copy paste above bottom right frame resize 55%
arrange on layer see tag.Add drop shadow.
Open AdoreYouFlower ChaosLounge copy paste above hearts in wordart layer
resize 35% add drop shadow.
Add new layer Layers Arrange Send to bottom, select all.
Open AdoreYouPaper4 ChaosLounge copy paste into selection,
deselect apply mask merge merge group.


Add your Artist © and your name then crop.

Thank you for trying my tutorial, I hope you enjoyed it.
I'd love to se your results so that I can show them on my Blog.

Tutorial by © Maree *Falcon (aka DesignbyFalcon) 5th February 2012.


Photobucket

With Love ♥


My Tutorials are strictly my own creations,
if they resemble another it is purely coincidence.
This was written with the use of PSP X2.
You may create it any version of PSP.
Supplies Needed.

Scrap With Love FTU-Blog Train by Doris Scrap Dimensions .You can find it Here.
Please remember to leave some Love ♥

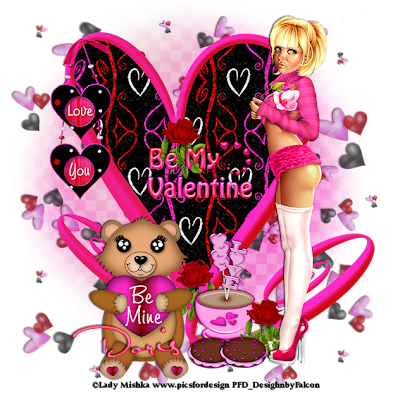
I'm using the artwork of © Lady Mishka Currently available at PFD Here.

Font of choice or the one I am using Satisfaction.

Mask_208 by Weescotslas.s Here

Open new image 700 x 700 transparent background.

Open SD WL Frame 5 copy paste as new layer .
Click inside frame with Magic wand Selections Modify Expand by 4 .Open SD WL Paper613 copypaste as new layer resize paper by 75% arrange over frame.
Selections Invert tap Delete, move below frame.Give a
Drop shadow 2/2/50/5.
Open your tube copy paste as new layer resize if needed arrange on layer give it a drop shadow.
Open SD WL Heart Bear copy paste as new layer resize 65%
arrange on left of frame.Give a drop shadow.
Open SD WL Embelishment 1 copy paste as new layer resize 35%
arrange on frame.Add drop shadow.
Open SD WL Cup coopy paste as new layer resize 35% arrange at bottom of frame
add drop shadow
Open SD WL cookie 4 copy paste as new layer resize 25% arrange at bottom of cup
duplicate add drop shadow.
Open SD WL Rose 2 copy paste as new layer, duplicate twice arrange on layer
add drop shadow.
Open SD WL Scattered Heart copy paste above backgrund layer.
Open SD WL Paper14 copy paste as new layer apply mask merge merge group.

Add your Artist © and your name then crop.

Thank you for trying my tutorial, I hope you enjoyed it.
I'd love to se your results so that I can show them on my Blog.

Tutorial by © Maree *Falcon (aka DesignbyFalcon) 4th February 2012.


Photobucket

Saturday, February 4, 2012

New layout♥


A big Thanks to Alika Scraps
for Designing my new blog layout.


Photobucket