Friday, June 29, 2012

*4th July Celebrations* FTU


My Tutorials are strictly my own creations,
if they resemble another it is purely coincidence.
This was written with the use of PSP X3.
You may create it any version of PSP.

Supplies Needed.

Scrap Celebration of Independance-FTU by Bev-HorsePlay's Pasture.
You can find it Here.
Please remember to leave Bev some love when downloading this kit.

I'm using the artwork of ©Elias Chatzoudis Currently available at PTE

Font of choice

Mask_84 by Weescotslass Here.

Open new image 700 x 700 transparent background.

Open hpd_COI_11 copy paste as new layer. Click inside with Magic wand.
Selections Modify Exand by 5. New layer below frame.
Open hpd_COI_Paper8 copy paste into selection.Deselect.
Open your tube copy paste as new layer arrange to your liking add drop shadow.
Open hpd_COI_10 copy paste below paper layer .Image Flip
 then move down slightly to the leftadd drop shadow.
Open hpd_COI_3 copy paste as new layer arrange on right of frame add drop shadow.
Open hpd_COI_31 copy paste as new layer arrange at bottom of frame see tag add drop shadow.
Open hpd_COI_4 copy paste as new layer arrange on layer resize 65% add drop shadow.
Open hpd_COI_36 copy paste as new layer arrange at top of frame.
Image Mirror add drop shadow.
New layer Selections-select all.
Open hpd_COI_Paper1 copy paste into selection, deselect then apply mask Merge group.
Click on background layer floodfill with #ffffff.

Add your Artist © and your name then crop.

Thank you for trying my tutorial, I hope you enjoyed it.
I'd love to se your results so that I can show them on my Blog.

Tutorial by © Maree *(DesignsbyFalcon) 2012.


Photobucket


This is Kays's result using this tut.


♥Independance Celebrations ♥ FTU


My Tutorials are strictly my own creations,
if they resemble another it is purely coincidence.
This was written with the use of PSP X3.
You may create it any version of PSP.

Supplies Needed.

Scrap Celebration of Independance-FTU by Bev-HorsePlay's Pasture.
You can find it Here.
Please remember to leave Bev some love when downloading this kit.

I'm using the artwork of ©BamBam Currently available at PTE

Font of choice or the one I used Majestic.

Mask of Choice or the Mask lmm_124 by Laurie Made Me Here.
Or one of your choice.

Open new image 700 x 700 transparent background then floodfill iwth #ffffff.

New layer Select All then open hpd_COI_Paper6 copy paste into selection.Deselect.
Apply your mask Merge group. Duplicate layer then Image Flip.

Open hpd_COI_8 copy paste as new layer arrange at top of layer add drop shadow.
Open hpd_COI_16 copy paste as new layer move to left of layer under the heart add drop shadow.
Open hpd_COI_15 copy paste as new layer move to center of layer add drop shadow..
Open hpd_COI_14 coy paste as new layer move to right of layer add drop shadow.
All the star circles should be overlapping each other see tag.
Add your main tube now place in center of layer add drop shadow resize if needed.
Open hpd_COI_21 copy paste as new layer Image Mirror move to right of layer.Add drop shadow
Open hpd_COI_22 copy paste as new layer arrange on left of layer add drop shadow.
Open hpd_COI_7 copy paste as new layer arrange flag in front of  your tube, add drop shadow.
Open hpd_COI_30 copy paste as new layer below tube layer.
Open hpd_COI_6 copy paste as new layer arrange on right of layer see tag, add drop shadow.
Open hpd_COI_20 copy paste as new layer move down to bottom of flag.

Add your Artist © and your name then crop.

Thank you for trying my tutorial, I hope you enjoyed it.
I'd love to se your results so that I can show them on my Blog.

Tutorial by © Maree *(DesignsbyFalcon) 2012.


Photobucket


Kaye's result using this tut


*Happy 4th July* FTU♥


My Tutorials are strictly my own creations,
if they resemble another it is purely coincidence.
This was written with the use of PSP X3.
You may create it any version of PSP.

Supplies Needed.


Limited Time Scrap Kit.


Scrap The Red White Blue by Tasa's Playground .You can it find Here.
http://tashasplayground.blogspot.com

I'm using the artwork of © Keith GarveyCurrently available at PTE
or tube of choice

Font of choice

Mask wsl_84 by Weescotslass Here.

Open new image 700 x 700 transparent background then floodfill with #ffffff.

Open frame 3 copy paste as new layer add drop shadow.
Click inside frame with Magic wand Selections Modify Expand by 5.
Add new layer below frame layer.
Open Paper_10 copy paste into selection on new layer, deselect.
Open your closeup tube copy paste arrange on layer resize 60%,change the
blend mode to Lumancy(L) then duplicate Image Mirror 
then move the left image up slightly up,see tag.
Open sparkle_2 copy paste as new layer arrange over your closeup tubes to your liking.
Open fireworks 1,2 and 3 copy paste these below paper layer
 arrange to your liking or placethem as I have.
Open flags copy paste as new layer drag them to top of frame add drop shadow.
Open bow_3 copy paste as new layer arrange on left of frame about
third of the way up Resize70%.
Duplicate bow then resize 85% move this above the other bow.Give both bow a drop shadow.
Add your main tube now arrange in center of frame.Add drop shadow.
Open flipflops copy paste as new layer arrange bottom left of frame add drop shadow.Resize 70%.
Open bags copy paste as new layer arrange in center of frame resize 70% add drop shadow.
Open bird copy paste as new layer arrange on right of layer add drop shadow.
Open baseballbat copy paste as new layer arrange at bottom add drop shadow.
Open stars copy paste as new layer, drag to right side move down, see tag.
 Duplicate ImageMirror give both a drop shadow.
Add new layer above background layer Select All.
Open paper_4 copy paste into selection.Deselect then apply mask Merge group.
Duplicate Image flip.

Add your Artist © and your name then crop.

Thank you for trying my tutorial, I hope you enjoyed it.
I'd love to se your results so that I can show them on my Blog.

Tutorial by © Maree *(DesignsbyFalcon) 2012.


Photobucket

Kaye's result using this tut


Sunday, June 17, 2012

Life's Purfect Bubble ♥


My Tutorials are strictly my own creations,
if they resemble another it is purely coincidence.
This was written with the use of PSP X3.
You may create it any version of PSP.

Supplies Needed.

Scrap Life Is The Bubbles by Jen SleeknSazzy Designz.
You can find SleeknSassy Designz creations   Here.

I'm using the artwork of ©KatNKDA Currently available Here

Font Adine or font of choice.

Mask wsl_82 by Weescotslass. Here 

Open new image 700 x 700 transparent background.

Open LITB_Paper10 copy paste as new layer apply mask merge group.
Open LITB_Element40 copy paste as new layer add drop shadow.

Add a new layer. Select your Selection Tool-change Circle and draw out
a circle slightly smaller than LITB_Element40.


Open LITB_Paper4 copy paste into selection.Deselect then move below Element40 layer.
Use your Move Tool align and position selection.
Open LITB_Element12 copy paste as new layer above paper layer resize 65%.
Open LITB_Element44 copy paste as new layer resize 60% move to right
of layer then add drop shadow.
Open LITB_Element54 copy paste as new layer resize 75% arrange in center of layer
 then add drop shadow.
Add your tube now I used the closeup tube then resize 85% arrange on left of layer.
Open LITB_Element3 copy paste as new layer resize 85% move to
 bottom of layer then add drop shadow.
Open LITB_Element26 copy paste as new layer resize 25% arrange
on top of LITB_Elemt3 add drop shadow.

Add your Artist © and your name then crop.

Thank you for trying my tutorial, I hope you enjoyed it.
I'd love to se your results so that I can show them on my Blog.

Tutorial by © Maree *(DesignsbyFalcon) June 2012.


Photobucket

Saturday, June 16, 2012

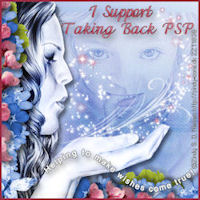
♥ TAKING BACK PSP ♥


Taking Back PSP is in the simplest of terms,
 a  community event designed to bring 
taggers together for a fun evening,
 and at the same time raise funds for 


Make A Wish Foundation.


Since 1980, the Make-A-Wish-Foundation®
has enriched the lives of children with 
life-threatening medical conditions through
 its wish-granting work.
 The Foundations's mission reflects the 
life-changing impact that a 
Make-A_Wish® 
experience has on children, families, referrals sources, donors, sponsors,
 and the entire communities.


Pleas join us for the next Taking Back PSP event, being held September20, 2012. 
Your donation of $10.00 USD will go to
 Make A Wish Foundation, 
and in return you will receive all of the exclusive tubes, scrapkits and other goodies we have donated to this event.


Keep checking back to our updated list of donated to this great cause!


Please Visit Here to Donate.


Photobucket

Tuesday, June 12, 2012

Sugar Plum Fairy ♥


My Tutorials are strictly my own creations,
if they resemble another it is purely coincidence.
This was written with the use of PSP X3.
You may create it any version of PSP.

Supplies Needed.

Scrap Plum Happy by Nettes NightOwl Works .You can purchase it at  Here.
This is part of Bundle 1 Nette has created.


Tube of choice. I have used the tube included in kit.

Font of choice or the font I am using Machia

Mask wsl_84 by Weescotslass Here.

Open new image 700 x 700 transparent background then floodfill with #ffffff.

Add new raster layer Selections Select All.
Open netpaper7 copy paste into selection apply mask merge group.
EffectsMosaic-antigue apply these settings:


New layer then open Dragonfly-Sindots11 apply these settings.
I have given the color I chose but if you wish to use another color please do so.


Duplicate your layer then add a light drop shadow 0/0/50/2.
Using your Preset shape tool square draw out a med square convert to raster layer.
Repeat again drawing a slightly larger square.
Click on second square layer Selections Float Defloat.
Open netpaper19 copy paste into selection-deselect.
Adjust Add noise tick Uniform 100% then tick Monochrome-ok.
Click on Med square layer selections Float Defloat open netpaper20
copy paste into selection-deselect.

Open netstrartrail copy paste as new layer above sindot layer add a drop shadow.
Open netwiredoodle3 copy paste as new layer add a light drop shadow.
Open gem3 coopy paste as new layer arrange on top left corner.Duplicate then Image Mirror.
Open net dangel 3 copy paste as new layer resize 15% arrange on top right corner
under gem3 layer add drop shadow.
Open sparkle copy paste as new layer arrange at bottom of square.
Open nymph tube or tube of choice copy paste as new layer arrange at bottom of square
 see tag. Resize 75% give a light drop shadow.
Open Diva's Tag_Tag8_Scrap and Tubes3 copy paste arrange at bottom of tube
 resize 65% add drop shadow.

Add your Artist © and your name then crop.

Thank you for trying my tutorial, I hope you enjoyed it.
I'd love to se your results so that I may show them on my Blog.

Tutorial by © Maree *(DesignsbyFalcon) June 2012.


Photobucket

Reflections-Timeline Topper ♥


My Tutorials are strictly my own creations,
if they resemble another it is purely coincidence.
This was written with the use of PSP X3.
You may create it any version of PSP.

Supplies Needed.

Scrap Earthy Sparkle by Nettes NightOwl Works .You can purchase it at  Here.
This is part of Bundle 1 Nette has created.


I'm using the artwork of ©Verymany Currently available at PFD Here.

Font of choice.

Filters Used
CPK Designs - Puzzler
AAAFrames


Open new image 850 x 315 transparent background.

On background layer, Selections-Select All then open paperpreview copy paste into selection.
then apply CPK Designs-Puzzler using these settings:


Open your closeup tube copy paste above background layer duplicate
 then resize 65%  on original tube, move to centre of  layer.
Click on Blend Mode change to Soft Light.

Open nersummerflower3 copy paste as new layer below duplicated tube layer.
Arrange on left of layer give a light drop shadow.
Open flower rope copy paste as new layer resize 69% arrange at bottom of layer see tag
 give alight drop shadow.
Open netsummerflower* copy paste as new layer resize 65% arrange on left of layer
add a light drop shadow.
On the  duplicated tube layer give this a drop shadow 3/3/50/5.
Open fairy dust copy paste as new layer move to left arrange to your liking
 then duplicate.Image Mirror.

Add your Artist © ,  then right click and Merge Visible.
Effects click on AAAFrames then use these settings:


Add your name I used font Maria Antuanetta size 48 FG#f0e1ad, BG#414141 stroke 1,
  add a drop shadow then save your tag.


Thank you for trying my tutorial, I hope you enjoyed it.
I'd love to se your results so that I can show them on my Blog.

Tutorial by © Maree *(aka DesignsbyFalcon) June 2012.


Photobucket

Angel's Reflection ♥


My Tutorials are strictly my own creations,
if they resemble another it is purely coincidence.
This was written with the use of PSP X3.
You may create it any version of PSP.

Supplies Needed.

Scrap Angels Delight by Nette NightOwl Works .You can purchase it at  Here.
This is part of Bundle 1 Nette has created.


The artwork of ©Zindy Neilsen Currently available Here.

Font of choice

Mask of Choice

Open new image 700 x 700 transparent background.

Open Kristy08_CircleRibbonFrame-5 copy paste as new layer.
Select your Freehand selection tool and outline the circle inside the silver cirlce.
Then apply Effects-Texture Effects-Mosaic-Glass with these settings.


Open your tube preferably one with angel wings copy paste as new layer resize
to fit insidecircle, dulpicate.On original layer change the
Blend mode to Luminancy (L).
Open Bunch of Glitter Leaves_Bunch2_Scrap and Tubess2 copy paste as new layer
above background layer.
Resize 75% then duplicate. Arrange at top of circle see tag. Add a drop shadow.
Open blue charm copy paste as new layer resize 75% arrange at top of Glitter leaves
.Add a light drop shadow.
Open Lovely bow_Bow3_Scrap and Tubes copy paste at bottom right of frame
resize 85% add drop shadow.
Open HIBISCUS2 and 3 copy paste as new layer resize to fit then  duplicate
then resize again place around ribbon.Give all a drop shadow.
Open cloud2 copy paste below frame layer. Duplicate 3 times arrange to your liking.
Open your main tube copy paste arrange on left of frame, give this a drop shadow.
Open Redju_CU_DesignerMix6_fireworks02 copy paste above background layer.
Click on background layer Select All.
Open np10 cop paste into selection, deselect then apply mask merge group.


Add your Artist © and your name using Palace Script font FG#dec3ae BG# 4a5e7e stroke 0.5
 add a drop shadow 2/2/50/3 or your choice of font then crop and save.


Thank you for trying my tutorial, I hope you enjoyed it.
I'd love to se your results so that I can show them on my Blog.

Tutorial by © Maree *(aka DesignbyFalcon) June  2012.


Photobucket

Sunday, June 10, 2012

Under The Sea♥


My Tutorials are strictly my own creations,
if they resemble another it is purely coincidence.
This was written with the use of PSP X3.
You may create it any version of PSP.

Supplies Needed.

Scrap Under The Sea created by  Black Widow Creationz .
You can purchase it Here.

I'm using the artwork of © Elias Chatzoudis or your tube of choice.
 This tube is currently available at PTE

Font of choice or the one I used Shell.

Mask of Choice

Open new image 700 x 700 transparent background.

On your background layer Select all.
open BWC_Underthesea_PP8 copy paste into selection
.Deselect then apply mask. Merge group.
Duplicate mask layer then Merge down. View -Image -Mirror.

Open BWC_Underthesea_EL19 copy paste arrange on layer.
Open BWC_Underthesea_EL43 copy paste as new layer resize 75% place on right of frame.
Open BWC_Underthesea_EL39 copy paste as new layer above background layer resize 90%.
Open BWC_Underthesea_EL29 copy paste as new layer resize 35% add drop shadow.
Open your tube copy paste arrange to your liking. using your Selection tool
 outline part of the tube see below.Selections -Promote Selection to layer.
 Move this above the frame layer.
Using your Eraser remove any bits overhanging the frame
. Give your full tube a light dropshadow 2/2/50/5.
Open BWC_Underthesea_EL18 copy paste below tube selection layer.
Resize 75% twice then ImageMirror arrange on left bottom of frame.
Open BWC_Underthesea_EL1 copy paste as new layer resize 75% arrange
 on lower right corner offrame add drop shadow.
Open BWC_Underthesea_EL5 copy paste as new layer resize 38% arrange at bottom add drop shadow.
Open BWC_Underthesea_EL30 copy paste as new layer arrange
 at bottom right corner of frame.Resize 50%.
Open BWC_Underthesea_EL37 copy paste as new layer arrange on frame
at bottom resize 42% adddrop shadow.

Add your Artist © and your name then crop.

Thank you for trying my tutorial, I hope you enjoyed it.
I'd love to se your results so that I can show them on my Blog.

Tutorial by © Maree *(aka DesignbyFalcon) June 2012.


Photobucket

Tranquility ♥


My Tutorials are strictly my own creations,
if they resemble another it is purely coincidence.
This was written with the use of PSP X3.
You may create it any version of PSP.

Supplies Needed.

Scrap Alices Peaceful World created by Nette NightOwl Works.
This is part of Bundle 1 Nette has created. You can purchase it Here.

I'm using the artwork of ©Misticheskaya Currently available at PFD Here.

Font of choice or the one I used Elephant.

Mask of Choice

Open new image 750 x 750 transparent background.

Open Frame 2 copy paste as new layer, resize 85%.Add drop shadow.
Using your Magic wand click inside frame Selections Modify Expad by 8.Add a new raster layer.
Open your closeup tube copy paste into selection on new layer.Deselect.
Right click on frame layer Merge down.
Open net rop tag3 copy paste as new layer. Image FreeRotate 90 left
Resize the tag by 75%.Add adrop shadow.
Open net pansy3 copy paste as new layer  Image FreeRotate 90 left align on side of frame,
thenresize 65% add a drop shadow now. Duplicate Image Mirror.
Open candle1 copy paste as new layer arrange on bottom right corner
resize by 25% add a drop shadow.
Open sparkle* copy paste as new layer arrange at top of frame, see tag.
Open gem3 copy paste as new layer arrange on candle resize 85%.
Open your main tube copy paste as new layer arrange on left of frame
give it a drop shadow of 2/2/50/5.
Click on background layer Select All.
Open netpaper14 copy paste into selection,deselect then  apply mask,
 merge merge group.


Add your Artist © and your name then crop.

Thank you for trying my tutorial, I hope you enjoyed it.
I'd love to se your results so that I can show them on my Blog.

Tutorial by © Maree *(aka DesignbyFalcon) June 2012.


Photobucket