Wednesday, April 28, 2010

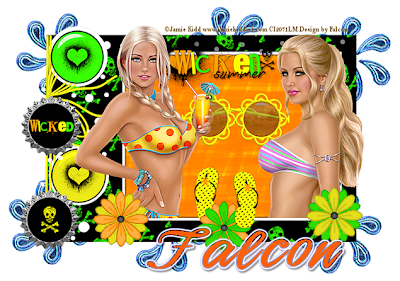
Wicked Summer Fun


Supplies Needed
PSP X2 ( any version will work)
Tube/s of choice or the one/s I am using Jamie Kidd 
this artwork can be found at CI|LM 
Scrap Wicked Summer by ChaneyJos Creations
this is a PTU and can be found  Here
Font of choice or the one I used: 4 Magic DNA
Drop Shadow of choice.
Template 155 by Ali and can be found  Here
Remember to Save Often!!!

Lets Begin

Open your template duplicate and close original on layer 1 fill with #ffffff.
Click on layer 2 Selections Float Defloat then
Open CJC_WickecSummer paper10 copy paste into selection, delete original layer.Deselect.
On layer 3 Selections Float De float then
Open CJC_WickedSummer paper 18 copy paste into selection, deselect.
Open CJC_WickedSummer element33 copy paste resize Image Free Rotate 90 degrees left 
place on left side see tag.
Open CJC_Wicked Summer element 48,49, 85,54 copy paste resize and place on left side see tag for placement.
Open your artist tube/s copy paste resize if needed then place them so they look as though
they are coming out of the frame above layer 4.
Open CJC_WickedSummer elements 61,62,63 copy paste resize and place below your tubes.
Open CJC_WickedSummer element 18 copy paste resize see tag for placement.
Open CJC_WickedSummer element 7 copy paste resize place one within the
frame and the other above the center flower.
Open CJC_WickedSummer element 01 copy paste resize place at top between your tubes.
Open new raster layer using your Picture tool I found a tube of water splash and placed these around.
Add your Artist © and name then crop and save.

This is only a guide and feel free to use any other element you wish.
Most of all have fun creating.

This tutorial was written by Maree (aka Falcon) on 28 April 2010
Any similarities to this tutorial are purely coincidental
© Maree

Tuesday, April 27, 2010

Sunshine & Love


Supplies Needed
PSP X2 ( any version will work)
Tube of chioce or the one I am using the gorjuss artwork of Suzanne Woolcott
you will find her artwork Here
Scrap Butter Bee Summer by Jay-Heartbeatz Creations
you can purchase it Here
Font of choice or the one I used:
Drop Shadow of choice.
Mask _196 by Vix Here
Remember to Save Often!!!

Let begin

Open new image 700 x 400.
Add a new raster layer using your Selection tool draw aout a square about medium size.
Open hc_bbs-paper 20 copy paste into selection. deselect. On the same layer draw out
a smaller square now hit delete.
Selections float Effects 3D Effects Outer Bevel with these settings.


Deselect.
Duplicate twice. Move them around till you are happy with position
then close out background layer and merge visible..
Using Magic Wand click inside all frames repeat this holding down the shift key.
Selections modify Expand by 3 open .
Open hc_bbs paper12 copy paste selections Invert Delete, now also choose your tubes
and copy paste onto frame.Hit delete, deselect. Move all below frame.
 X out your background layer and merge visible.
Open hc_bbs-element 35 copy paste resize place on corner of middle frame.
Open hc_bbs-element 1 copy paste resize duplicate, mirror place at bottom of frame,
Open hc_bbs-element 3 copy paste resize place on left side of frame above flowers.
Open hc_bbs-element 4 copy paste resize place on right side of  frame.
Open hc_bbs-element 21 copy paste resize duplicate mirror and place at top of frame.
Open hc_bbs-element 42 copy paste resize and place below frame.
Open hc_bbs-element 58 copy paste resize place on top middle frame.
Open hc_bbs-element  59 copy paste resize place on lower middle frame.
Open hb_bbs-element 8 copy paste as new layer.Selections float, defloat,
add new layer and with color of choice using your fill bucket then deselect.
Now delete original word layer and give it a drop shadow of choice.
Open hc_bbs-paper6 copy paste apply mask merge merge layers.
Add your Artist © and name then crop and save.

This is only a guide and feel free to use any other element you wish.
Most of all have fun creating.

This tutorial was written by Maree (aka Falcon) on 27 April 2010.
Any similarities to this tutorial are purely coincidental
© Maree

Broken Heart


Supplies Needed

PSP X2 ( any vision will work)
Tube of choice or the one I am using the Artwork by Krisgoat
and can be purchased at  CILM
Scrap Club Dead by Heartbeatz Creationz  is a PTU
and can be purchased at  HERE
Mask_6 by Vaybs  HERE
Font: of choice or the one I used DJ stroke
Drop Shadow of choice

Remember to Save Often!!!

Lets Begin
Open new image 700 xv700 with white background
Open new layer and fill with #000000 apply mask merge merge group.
Open HC_cd element 19 copy past resize if needed.
Click inside with magic wand selections Modify expand by 3 then
Open HC_cd paper 17 copy paste into selection
Selections Invert then hit Delete.Dont deselect yet.
Open your tube of chice copy paste move into postion then hit delete.Deselect now.
Move paper and tube under frame.
Open HC_cd element38 copy paste and resize then place on left side of frame.
Using your pick angle the key slightly to the right.
Open HC_cd element23 copy paste resize place above key element.
Open HC_cd element29 copy paste resize by 35 percent then place on top of frame above tube.
Open HC_cd element35 cop paste resize if needed then duplicate move behind frame.
Open HC_cd element34 copy paste resize then place on right side.
Open HC_cd element2 copy paste resize by38 percent see tag for placement.
Now give everything except your mask a drop shadow of choice.

Add your Artist © and your name crop and save.

This is only a guide and feel free to use any other elements you wish.
This tutorial was written by Maree (aka Falcon) on April 27 2010.
Any similarities to this tutorial are purely coincidental.

©Maree

Sunday, April 25, 2010

Spring Blossoms PTU


Supplies Needed

PSP x2 ( any version will work)
Tube of Choice i am using the beautiful artwork of Caron Vinson
you can purchase these CILM
Spring Frames by Tish of Skrapping Magic
you can purchase this Here
Mask WSL_84 Here
Drop Shadow of Choice
Font:Chicken king

Remember to save often!!!!


Lets Begin

Open new image 700 x 700 white background
New Layer select your Selection tool set to Square, draw out alarge square
Open tish_orche_fur copy paste into selection.
Open your tube copy paste into selection. Deselect.
New layer again with selection tool draw out a lateger square then your 1st one then
Open tish_diagonal_weave and paste into selection. deselectOpen tish_flower_swag copy paste
and resize place below tube,
Open tish_leaf_stalk copy paste between paper layers duplicate then on
duplicated layer image free rotate 25 degrees left.
Open tish+Lilly_valley_stalkcopy paste resize and postion on left side.
Open tish_glass_flower three copy paste postion see tag.
Open tish_gem_dangle_two copy paste resize and move to righ corner of frame
Open tish_butterfly_one copy paste resize and place above gem dangle on right side.
Open new layer above your background layer selections selelct all then.
Open tish_daisy_explosion copy paste into selection, deselect.
Apply your mask then merge merge grooup.

Add your Artist © and your name, crop and save.

This is only a guide and feel free to use any other elements you wish. 
Most of all have fun creating.

This tutroial was written by Maree (aka Falcon) on Arpil 25 2010.
Any similarities to this tutorial are purely coincidental
©Maree

Viva la France *PTU


Supplies Needed
PSP X2 ( any version will work)
I am using the amazing artwork of Elias Chatzoudis
you can find him at MPT
Springtime in Paris PTU by Kissed By Pix Designs a here.
Mask WSL_84 Here
Font:Grenouille
Drop Shadow of choice

Lets Begin

Open new image 700 x700 using your bucket color white
Open new layer and color this one black then apply mask merge merge group.
Open KBP_STIP_AntiqueRound copy paste resize click inside with Magic Wand  Selections Modify Expand by 4 then,
Open KBP_STIP_SwirlPaper1 copy paste resize by 50 percent, Selections Invert, Delete - deselect.
Open your tube copy paste resize if needed trim of excess at bottom of tube using your Eraser brush
Open KBP_STIP_Stem1 copy paste resize and place on left side of tube see tag for placement.
Open KBP_STIP_Flower1 copy paste resize and place below tube.
Open KBP_STIP_Flower2 copy paste resize and place below tube.
Open KBP_STIP_Flower3 copy paste resize and place below tube
Open KBP_STIP_Mask3 copy paste resize and place above seat.
Open KBP_STIP_Tower3 sopy paste resize place on left side of layer.
Open KBP_STIP_Bench3 copy paste resize and see tag for placement
Open KBP_STIP_ Feather 1 copy paste below tower.
Open KBP_STIP_Moon2 copy paste  resize and place behind tower.

Give all except your mask a drop shadow.
Add your Artist © and your name, crop and save.
This is only a guide and feel free to use any other elements you wish too.
Most of all have fun creating.
Thank you for trying my tutorial.
This tutorial was written by Maree (akaFalcon) on 25 April 2010.
Any similarities to this tutorial are purely coincidenta
© Maree

Thursday, April 22, 2010

Babe She's Got It *PTU


Supplies needed

PSP x2 (works in any version)
I used the amazing Tubes of Ismael Rac
you may purchase them at AMI
Paparazzi PTU Scrap by Angels Designz thanks Kelly for this wonderfulkit.
You can find it Here
Mask W SL_228 can be found Here
Drop Shadow of choice
Animation Shop
Font: Bickham Script Pro

Remember to save often!!


Lets Begin

Open New layer 700 x 700 Selection Select all
Open AD_Paper8 copy paste into selection, deselect or use Ctrl D.
App;ly mask merge merge group. Resize by 115 percent.
Open AD_CityScape1 copy paste reize y 65 percent.
Open AD_Paperstars  copy paste resize by 45 percent then duplicate mirror
Open AD_Frame1 copy paste with Magic wand click inside each frame
do this by holding the shift key.
Open AD_Paper copy paste Selection Invert hit Delete,don't deselect yet
then using the same artist using 3 different tubes copy paste resize if needed then hit Delete now Deselect.
Move paper then tubes under frame, X out the all layers expect frame paper and tubes,
Merge merge visible, now open all your layers.
Open AD_Camera1 copy paste resize by 35 percent and place next to frame right side.
Open AD_Present1,2,3,and 4 copy paste resize accordingy see tag for placement.
Open AS_Perfume and AS_Purse AD_HighHeel1 and AD_Flower copy paste resize all see tag for placement.
Open your tube copy paste on left side of frame the duplicate Mirror, then place tube back on left side,
rename tube layes 1 and 2 see layer below.


Open your Wordart folder Select AD_Wordart5 copy paste resize by 65 percent and place above frame, near sky line.
Add your Artist © and your name. Give items a drop shadow except Mask.

This is only a guide and feel free to use any other elements you wish too, 
and most of all have fun creating.

Animation Shop

Open AS then click back into PsP. Now on Tube layer 2 close this out (X).
Edit Copy Copy Merged click into AS paste as a New Animation.
Back in PsP open Tube 2 layer then X out tube 1 layer. Making sure you have high lighted Tube 2 layer.
Edit Copy Copy Merged click into AS Edit paste After Current Frame.
Now repeat these again. You now should have 4 frames.
Click on Animation scroll down to find Frame Properties and change to 60 click OK.
Click on Animation Resize Animation by 80 percent or you can leave as is.

Thank you for trying my tutorial.
 This tutorial was written by Maree (aka Falcon) on 22 April 2010.
Any similarities to this tutorial are purely coincidental
© Maree

Wednesday, April 21, 2010

Ozzie Ozzie Gold *FTU


Supplies Needed

PSP X2 ( will work in any version)
Olive Grove Scrap kit FTU by Lynn thanks for this wonderful kit.
You can find it Here
Elias Chatzoudis and exciting artist and I love his work
you can find him here at  MPT
Mask WSL_228  Here
Drop Shadow of choice
Font: Giddyup Std

Lets Begin

Open 600x 600 new Image - Transparent-white.
Open frame 2 copy paste rersize by 45 percent, click inside frame
with magic wand selections, modify expand by 4.
Open Paper 8 copy paste Selectons Invert hit Delete,
move under frame.Do not deselect yet
Open your tube copy paste move into position then hit deleteagain,
move under frame.Deselect now
Give your tube and frame a drop shadow. then close out your background and merge visible.
Open your background layer and continue.
Open heart pendant and copy paste resize by20 percent an place on top right side of frame,
Open Bow 3 copy paste resize by 20 percent and place top right corner of frame.
Open Paper 1 copy paste above background layer apply mask merge merge group.
Open Diamond trail copy paste resize as needed. Place above the mask layer.
Open your tube and copy paste place on the right side of frame see tag for placement.
Open decoration flower copy paste resize by 38 percent duplicate twice place at bottom of tube.
Open Flower 5 copy paste resize by 28 percent duplicat and
place on the outer decoration flower, see tag for placement.

Give all except your mask a drop shadow.
Add your Artist © and your name, crop and save.
This is only a guide and feel free to use any other elements you
wish too and most of all have fun creating.

Thank you for trying my tutorial.
this tutorial was written by Maree (aka Falcon) on 21 April 2010.
Any similarities to this tutorial are purely coincidental

© Maree

Butterfly Kiss's * FTU


Supplies Needed

PSP x2 ( will work in any version)
April Blues FTU scrap by Freesia Scraps

You can find it here at Freesia's Scraps
I used the wonderful artwork of Zindy Nielsen
you can find her  Here
Drop Shadow of Choice
Font:MoonDanceOne

REMEMBER TO SAVE OFTEN!!!

Lets Begin


Open 600 x 600 white background, then
Open cf2 copy paste resize by 30 percent.
Click on Magic wand slections Modify Expand by 3 then
Open Pap 18 copy paste resize by 50 percent x 2. Now then hit delete key

and move under frame.
Open your tube of choice copy paste adjust then hit delete then move below frame.
From your tube copy and paste Butterfly 3 resize by 75 percent 
and place on lower right side of frame.
Open el 40 copy paste resize by 35 percent then again by 45 percent
duplicate mirror see tag for placement.
Now click on your back ground layer.
Open el 54 copy paste resize by 45 percent then again by 55 percent.
Add your Artist © and your name, crop and save.

This is only a guide and feel free to use any other elements you wish 
and most of all have fun creating
Thank you for trying my tutorial.
This tutorial was written by Maree (akaFalcon) on
April 21 2010.
Any similarities to this tutorial are purely coincidental
© Maree

Monday, April 19, 2010

Playful Fairies* PTU


Supplies Needed.

PSP X2 9 any version will work)
Tube of Choice
I have used the Gorjuss Fairy Creations that are include within this scrap.
Thanks to Cindy of Puddycat Creations for creating this beatuiful kit.
Flutter Fun Times may be purchased  Here
Mask WSL_350
Drop Shadow of choice.
Font: Adore
REMEMBER TO SAVE OFTEN!!


Lets Begin

Open new layer 700 x 700 with white background.
New layer flood fill with @97d5c2 apply mask merge merge group.
Open pdc_frame 1 copy paste resize by 75 percent.
Using Magic Wand click inside of frame Selections Modfiy Expand by 4
Open pdc_paper 13 copy paste Selections, Invert delete move below frame.
Open pdc_cloud 1 copy paste move above paper , move around till you are happy with it.
Open pdc_bling copy paste resize by 50 percent.
Open pdc_tree 1 copy paste resize by 48 percent move to right side of frame.
Open pdc_fence 3 cop paste resize by 43 percent place below frame.
Open pdc_lace 1 copy paste resize by 38 percent place at bottom of frame
Open pdc_beehive1 copy paste resize by 55 percent move to left side of frame.
Open pdc_bee1 copy paste resize by 35 percent place above fence
Open pdc_flower 1 & 4 cop paste resize by 39 percent place lower right of frame,
Open pdc_elf 1 copy paste resize place at lower right side of frame
Open pdc_heart 1 copy paste resize by 37 percent place right hand top corner add your
Open pdc_ladybug 2 copy paste resize by 32 percent place on frame see tag
Open pdc_watercan 1 copy paste resize 50 percent then 45 percent place at bottom of frame.
Open pdc_Flutterfairies1_5 copy paste resize by 42 percent place on tope of beehive.
Open pdc_Flutterfairies1_4 copy paste resize by 35 percent see tag for placement.
Open pdc_butterfly net.copy paste resize by 28 percent place in from of fairy see tag for placement.

These are only a guide, feel free to use any other elements you wish and most of all have fun creating.
Give all except your mask a Drop Shadow of choice.
Add your Artist © and your name, crop and save.

Thank your for trying my tutorial.
This tutorial was written by Maree (aka Falcon) on April 19, 2010.
Any similarities to this tutorial are purely coincindental.
©Maree 2010

Thursday, April 15, 2010

Happy Mother's Day *


Supplies Needed

PSP x2 (will work in any version)
Tube of Choice or the beautiful artwork of Pinuptoons
that can be purchased at CILM
Mask WSL_311  Here
Any Elements you wish to use
Font:Three Dates,One Night 
or font of Choice
REMEMBER TO SAVE OFTEN!!!!

Lets begin

Open a new layer 650 x 650 white background.
New layer color of choice or the ones I used, Flood fill with this
# e2b4f2 or one of your choice. Apply mask  mere merge group, now
duplicate this layer 3 times rename these layers F1, F2 ,F3 ,F4. 
On F1 select Adjust Blur Guassin Blur radius 10.
New layer flood fill with #97dFc2 merge merge group resize this by75 percent.
Select your Picture Tool and find the daisy flower and 
 use these setting add as many as you want:
Click on layer F2 Effects dsb flux with these setting click the 
mix button once.

Click on layer F3 and repeat clicking twice.
Click on layer F4 and repeat clicking 3 times.
Using ellispe draw out circle to the edge of green hearts do not convert yet,
click on cirlce till 'A' appears then using font of choice type
 in the words "Happy Mother's Day".
Click on the + to open, then 'x' out the circle layer then convert to raster layer.
Give this a drop shadow Add your tube then you can add any other element you wish to use.
Give your tube and any element a Drop shadow..
Add your name and Artist ©.

Open Animation Shop
Back in psp close out layers F3 and F4, Click on F2 layer then Edit Copy Special
Copy Merged.Click on AS and Paste as a new animation.
Back in psp close out layer F2,click and open F3 and repeat as above. Then
in AS paste after current frame,do this again with F4.
Save as a gif and if you want resize.
Thank you for trying my tutorial.
This tutorial was written by Maree (akaFalcon)on April 15, 2010.
Any similarities to this tutorial are purely  coincidental.
© Maree 2010.

Fairy Garden * PTU


Supplies Needed

PSP x2 ( or any version will do)
Fairy Garden Scrap by Lynn at  Scrappers Emporium.
Masks WSL_146and WSL_ 153  from  Here
Font: Dagobert
Drop Shadow of Chocie.

REMEMBER TO SAVE OFTEN!!!

Let's Begin

Open 600 X600 New Image.
Open FAIRY GARDEN FRAME 1 Copy paste resize by 65 percent.
Open FAIRY GARDEN POND copy paste and resize to fit frame.
Move below frame.
Open FAIRY GARDEN MUSHROOM HOUSE copy paste and resize by
35 percent see tag for placement.
Open FAIRY GARDEN PLANT copy paste resize 30 percent and place near
mushroom house.
Open FAIRY GARDEN BUTTERFLY copy paste resize by 23 percent and
place on mushroom house.
Open FAIRY GARDEN GLITTER copy paste resize by 20 percent and place
above pond, duplicate then image mirror.
Open FAIRY GARDEN LAMP 1 copy paste resize by 15 percent and place
at top under the  frame.
Open FAIRY GARDEN BUTTERFLY TRAIL copy paste resize by 35 percent,
 place on left side of  frame then duplicate mirror.
Open FAIRY GARDEN FAIRY 1 and 2 copy paste resize to fit see tag
for placement. Or add a tube/s of choice.
Open FAIRY GARDEN PAPER 1 copy paste resize by 55 percent select
mask WSL_153 apply merge group. Move below frame.
Using your Ellispe preset tool draw a circle about the same size as
the maskusing these settings:

Using these colors, FG#570973 BG#d0f0db.Place this behind
the mask layer.
Add a new raster layer above your background layer then flood fill
with #818571 apply mask wsl_146 merge  mergre group.
Apply drop shadow to all layers except mask layers
Add your Artist © and name then save as a png, resize if needed.
Thank you for trying my tutorial, I would love to see your results.

This tutorial was written by Maree (akaFalcon)on April 15, 2010.
Any similarities to this tutorial are purely  coincidental.
© Maree 2010.

Sunday, April 11, 2010

Loving Sunflowers * FTU


Supplies Needed

Tube by Suzanne Woolcott and can be purchased at  Artistic Minds   
Scrap kit Loving Sunflowers by Rebbeca  Here
Mask WSL_344 and WSL_351 Wee Scots Lass
PSP X2 or any version
Animations Shop
Drop Shadow of Choice
Remember to save often!!!

Lets Begin

Open new image 600 x 600.
Open Paper 7 copy paste apply mask wsl_344 merge merge group.Rename layer Mask 1.
Open Paper 3 copy paste apply mask wsl_351 merge merge group.Rename this layer Mask 2.
Open Sunflower2 copy paste then resize by 85 percent 
Open Frame 2 copy paste resize place near top of layer.Click inside frame with Magic Wand  then go to Selections Modify Expand by 3. 
I used #ffff00 color and a gold gradient for effect
Use these setting or your choice:

Add the text I used or something of your own choice.
Open HalfSunflower copy paste resize Image flip and see tag for placement.
Open Flowerborder 3 copy paste resize then Image Free Rotate by 90 degree's Left. Place at top of frame. Give this a Drop Shadow of choice.
Open Tall Grass copy paste resize by 50 percent place bottom left side.
Open Sunflowers 5 copy paste duplicate on duplicated layer resize by 85 percent. Place around grass.
Open Sunflowers 7 copy paste resize by 55 percent place in fron of grass.
Add any other Elements you like.
Open your tube of choice copy paste see tag for placement. Add a Drop Shadow to the layers except mask layers.

Add your Artist © and your name.If you don't wish to Animate the tag then crop save as png.

Open Animation Shop.
Back to PSP. Copy copy merged, Click in AS and paste as New Animation.
Back to PSP.Click on the mask layer 2 lower the Opacity to 80 percent. Edit copy merge copy, click in AS paste after Current frame.
Back in PSP lower the Opacity to 50 percent copy copy merged, click on AS and paste after current frame.
Back into PSP, lower Opacity to 10 percent Copy copy merged. Click in AS and paste after current frame. You now should have four frames.
Click on Frame 3 copy paste after frame , repeat this again for Frames 2 then Frame 1. You now should have 7 frames.
Click on Animation then Frame Properties and change the number to 45, click Ok. Now view your animation and if you are happy then crop resize and save as a gif.

Thank you for trying my tutorial.
This tutorial was written by Maree (akaFalcon)on April 10, 2010.
Any similarities to this tutorial are purely  coincidental.
© Maree 2010.


Friday, April 9, 2010

SpringTime * FTU


Supplies Needed

Psp x2 or any version will work

Scrap kit A Day in the Garden FTU by Vaybs.
Tube of choice or the beautiful artwork of Suzanne Woolcott
you can purchase them... here
Xenofex 1.1 Fluffy Clouds
Drop Shadow of choice.
Font: Every Time I Miss You
Remember to Save Often!!
Lets Begin

Open new layer 650 x 600 fill with white color
Layers new layer and flood fill with #2becf effects Xenofex 1.1 Fluffy cloudy with these settings:
click to enlarge
New layer using your picture tube - look for the grass and click 3-4 times to give a good cover.Using these settings.
click to enlarge
Open DVB A DAY IN THE GARDEN element 14 copy paste resize 64 percent then  dupicate place above grass layer.
Open DVB A DAY IN THE GARDEN element 21 copy paste resize 48 percent and place in front of fence.
DVB A DAY IN THE GARDEN element 13 copy paste resize 68 percent, duplicate.
Open DVB A DAY IN THE GARDEN element 25 copy paste resize by 75 percent and place in center of layer.
Open your tube copy paste place under flower arch.
Open DVB A DAY IN THE GARDEN element 4 copy paste resize by 62 percent and place on left side. I add the bird from Suzanne Woolcot tube and resized by 73 percent or you can use any other element if you wish.
Open DVB A DAY IN THE GARDEN element 16 copy paste resize by 28 percent.
Open DVB A DAY IN THE GARDEN element 27 copy past resize by 39 percent and place near basket.
Open DVB A DAY IN THE GARDEN element 31 copy paste resize by 67 percent
see tag for placement.
Give all elements a light Drop Shadow.
Add your Artist © and your name. Save as a png and you are done.


Thank you for trying my tutorial.
This tutorial was written by Maree (akaFalcon)on April 7, 2010.
Any similarities to this turtorial are purely  coincidental.
© Maree 2010.

Rockin Rac * PTU


Supplies Needed

PSP X2 OR ANY VERSION WILL WORK
I used the amazing artwork of Ismael Rac and you will find them at  Artistic Minds
Or a tube of your choice.
Scrap: Rock It by Lynn of   Scrappers Emporium 
Mask WSL_84  Weescotslass Creationshere
Drop Shadow of choice
Effects Eye Candy: Gradient Glow
Fonts used: Arial and AngryBlue
REMEMBER TO SAVE OFTEN!!!

Lets Begin

Open 700 x 700 flood fill with white.
Open ROCK IT TRIPLE FRAMES copy paste resize by 45 percent
using your Magic wand click inside each frame Selelctions Modify Expand by 4
Open ROCK IT PAPER 1 copy paste Selections Invert Delete, move paper below frame.Select none.
Open ROCK IT MUSIC NOTES 1 copy paste in frame 1 resize to fit.New layer, selelct music notes with Magic Wand then on new layer use Flood Fill fill with color white,
you then can delete the original layer.
Open ROCK IT GUITAR 2 copy paste in frame 1 resize to fit, place in front of music notes.
Open ROCK IT DRUM KIT copy paste resize to fit.
Open ROCK IT DISC copy paste in frame 3 resizing to fit, I then recolored the disc gold.
Select Preset Tool Ellispe draw a small circle on the disc, then using font Arial 8 type the words Rockin Rac.
Open your tube and place just off center to the left of screen, resize if needed.
Open ROCK IT DRUM STICK copy paste resize by 75 percent place in front of tube.
Open ROCK IT MUSIC NOTES 2 copy paste resize by 65 percent and place behind frame layer at top.
Open ROCK IT CORSET copy paste resize by 45 percent then using Gradient Glow with these settings:

 Click to enlarge.
Give a drop shadow of choice.
Open ROCK IT BOOT 2 copy paste Image Mirror resize by 35 percent duplicate then resize the duplicated layer  by 85 percent see tag for placement.
Then using Gradient Glow using the same settings as before then give a Drop Shadow.
Add any other Elements you wish to use.
Open ROCK IT PAPER 6 copy paste as new layer above background layer apply mask merge group.
Add your Artist © and your name. Crop and save now you are done.

Thank you for trying this tutorial I hope you enjoyed it.
This tutorial was written by Maree (aka Falcon) on April 9th, 2010.
Any similarities to this turoiral are purely coincidental.
©Maree 2010.

Friday, April 2, 2010

Easter Hunt * FTU


Supplies Needed

PSP X2 it will work in any version
Scrap Kit Easter 2010 FTU by Vaybs you can find it    Here
Tube I used Elias Chatzoudis at MPT
Mask WSL_84 Here
Drop Shadow of Choice.
Remember to Save Often!!!

Lets begin

Open 600 x 600 new image
New layer using color #2b8ecf flood fill layer, then apply mask or one of your choice. Merge Merge group.Effects Texture Effects Weave with these settings

Open DVB Easter2010 element 18 copy paste resize by 75 percent.
Open DBV Easter 2010 element 20 copy paste duplicate see tag for placement.
Open DBV Easter 2010 element 11 copy paste then  resise by 73 percent.Place on bottom left side.
Open DBV Easter 2010 element 8 copy paste resize by 38 percent place in center of tub.
Open DBV Easter 2010 element 15 copy paste resise by 47 percent and place in front fo tub.

Open DBV Easter 2010 element 16 copy paste resize by 39 percent and plac in fron of grass.
Open DBV Easter 2010 element 2 copy paste and resize by 65 percent and place top left corner.

Open DBV Easter2010 element 4 copy paste resize by 69 percent place bottom right hand side.

Open your tube of choice copy paste resize by 85 percent.

Open DBV Easter 2010 element 6 copy paste resize by 48 percent place in center below tube.
Add any other element you like. Give everything a light drop shadow.
Add your Arthist © and your name. Save as a png. Crop or resize and your done.
Thank you for trying my tutorial I hope you enjoy it.

This tutorial was written by Maree (akaFalcon)on April 2, 2010.
Any similarities to this turtorial are purely  coincidental.
© Maree 2010.