My Tutorials are strictly my own creations,
if they resemble another it is purely coincidence.
This was written with the use of PSP X3.
You may create it any version of PSP.
Supplies Needed.
ScrapEaster Delight by Scraps by Danielle. You can purchase it Here.
I'm using the artwork of ©Elias Chatzoudis Currently available at PTE Here.
Font of choice
Mask_14 by Weescotslasscreations Here.
Template_ Lets Celebrate by Addictive Pleasures Here.
Open yor Template then delete the © and star layers.
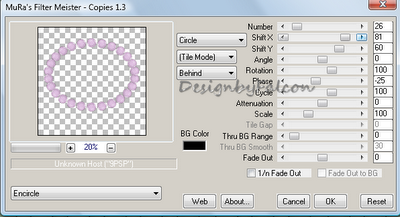
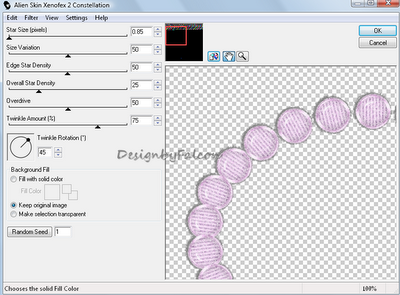
Click on Large circle layer Select All Float then Defloat.Add new layer or
paste into original layer.
Open Paper 11 copy paste into selection into layer. Deselect. Delete original layer.
Repeat above using these Papers.
Shape layer Paper 8
Small circle layer Paper 2
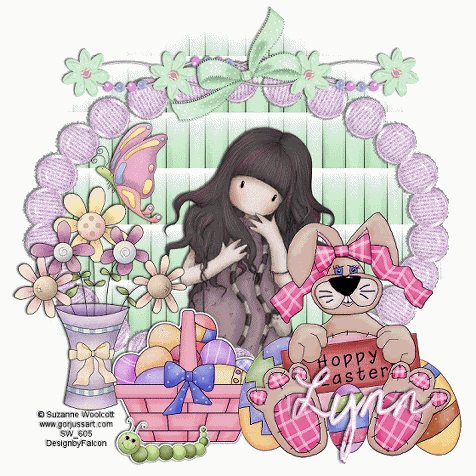
Open your tube copy paste as new layer resize if needed add drop shadow
arrange to your liking on layer.
Open Tulips copy paste as new layer arrange on left of layer resize 65% add drop shadow.
Open Easter Lillies copy paste as new layer resize 35% arrange on small cirlce.
Duplicat Image Mirror arrange add drop shadow.
Open Happy Easter Eggs copy paste as new layer arrange at bottom of layer
resize 65% add drop shadow.
Open Rabbit with Flower copy paste as new layer arrange on left of layer
resize 75% add drop shadow.
Open Bunny with Eggs copy paste as new layer arrange on right of layer
resize 85% add drop shadow.
Open Bunny with Hear copy paste as new layer Image Mirror arrange bunny sitting on small circle resize as needed. Add drop shadow.
Click on your text layer.Select All Float Defloat.
Open Paper 12 copy paste into selection.Deselect.Add drop shadow.
On text layer right click and Merge down-glittertext layer.
Arrange at top of layer.Resize 75%
Open Paper 10 copy paste as new layer apply mask merge group.
I duplicated mine to show the mask better.
Add any other element you wish too to finish your tag.
Add your Artist © and your name then crop.
Thank you for trying my tutorial, I hope you enjoyed it.
I'd love to se your results so that I can show them on my Blog.
Tutorial by © Maree *(aka DesignbyFalcon) 24th March 2012.